Wednesday, July 6, 2011

Raspberry Lemonade

Lemonade

OK people, it's officially summer. In case you couldn't tell by the extreme heat and crazy weather. Or the fact that the 4th of July was just a few days ago. And I don't think there's anything that says summer more than lemonade. Maybe sitting by the pool with ice cream dripping down your fingers. Ooo wait. I totally have it. Sitting by the pool with ice cream dripping down your fingers sipping this lemonade. Summer overload.

I made this a few weeks ago for the bridal shower where I also made these sandwiches and Kaanan made these cupcakes. It was super delicious and a nice drink for a soon to be (any day now!!!) new Mom!

Raspberry Lemonade
Source: Joy the Baker


For the sauce:
1 small package raspberries (about 6 oz)
1 tbsp sugar
1 tbsp water

For the simple syrup:
1 cup sugar
1 cup water

For the lemonade:
1 cup fresh squeezed lemon juice, 4 to 6 lemons
4 cups cold water

First, make the simple syrup. Heat the 1 cup water and 1 cup sugar in a small saucepan until sugar dissolves.

Meanwhile, make the sauce! Combine raspberries, sugar, and water in the bowl of a food processor and process until smooth. Set a fine mesh strainer over a bowl and pour in raspberry puree. Use a spatula to press the puree through the strainer so that only the seeds remain in the strainer.

Combine lemon juice, cold water, 1/4 cup of sauce and simple syrup in a large pitcher. Stir to combine and test to see if it needs more sugar. Refrigerate for at least 1 hour.

Enjoy!

PS. This sauce is awesome on greek yogurt for breakfast in the morning. Or on top of vanilla ice cream. A-mazing.

Saturday, July 2, 2011

Palak Tofu

Palak Paneer

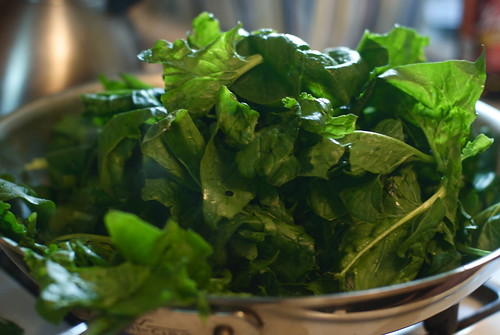
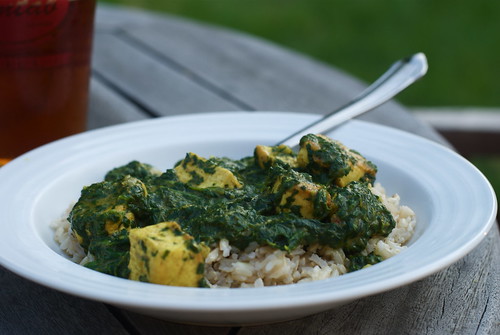
Spinach season is almost over! I loved getting tons of spinach in the CSA this year. I'm a little behind on posting recipes (silly grad school) but I'm trying to get caught up. This is just in time for the last part of the spinach season, so go out and make this. It's sooooo good.

Palak Paneer

As before with the Mattar Tofu, I used tofu in this recipe instead of paneer. And just to blow your health freak socks off, I totally served this over brown rice. Yeah, that's right. Health. Food.


Palak Paneer

Palak Paneer

Palak Paneer
Adapted from my Kaanan's recipe for Palak Paneer

1 package extra firm tofu
2 tbsp olive oil
2 tbsp butter
2 bunches spinach, washed and torn
1 shallot (or small onion), diced
2 cloves garlic, minced
1 cup milk
1 tbsp flour
2 heaping tsp Garam Masala
1 tsp ground coriander
1/2 tsp turmeric
1 tsp chile powder

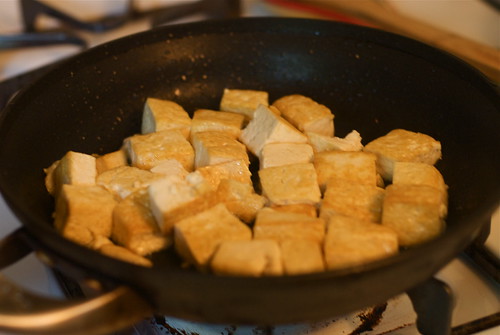
In a medium nonstick skillet, heat 1 tbsp olive oil over medium-high heat. Once the pan is hot, add the tofu and fry on all sides until golden brown. Set aside.

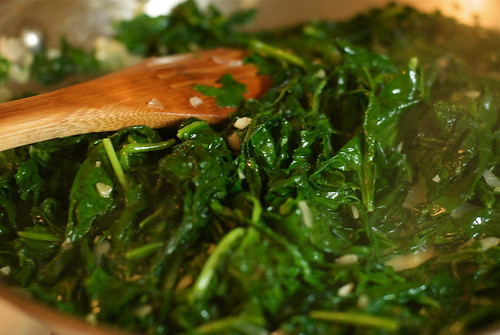
While the tofu is frying, melt the butter and remaining oil to a large saucepan over medium heat. Add the shallot and garlic and cook until soft, about 3-4 minutes. Add the spinach in batches and cook until wilted. Continue cooking spinach until it is all wilted. Add flour and stir to coat spinach. Pour in milk and stir until combined. Cook for a few minutes, then remove from heat.

Blend the spinach using either an immersion blender right in the pan or carefully transfer spinach to a food processor and pulse until mixed. Return to pot and add Garam Masala, coriander, turmeric and chile powder. Salt to taste.

Add tofu to spinach and mix to combine. Cook until tofu is heated through. Serve over rice or with naan.

Enjoy!

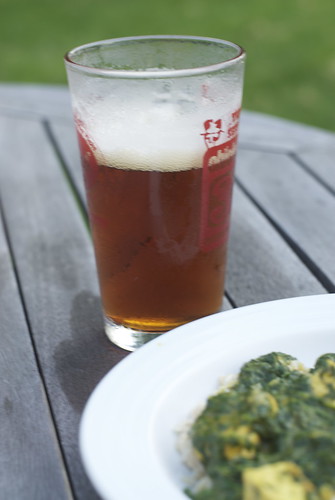
Oh, and if you happen to be cooking this on a 90 degree day with the threat of blackouts due to every single air conditioner being run at full capacity, you might need one of these.

beer.

Friday, July 1, 2011

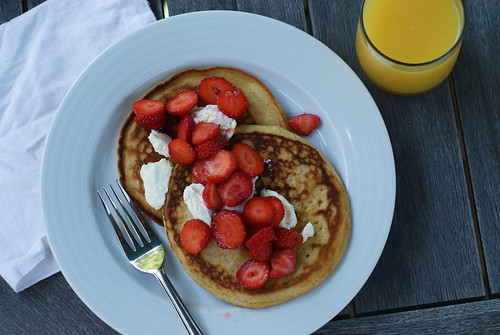
Whole Wheat Pancakes with Whey

Whole Wheat Whey Pancakes

Made ricotta cheese recently? Have a whole lot of leftover whey and no ideas on what to do with it? Never seen whey in your life and you're wondering why it looks mildly like uncooked egg whites? Well, friends, you've come to the right place.

I made ricotta cheese the other day and I thought it would be fun to try something with the leftover whey from the cheese making. I figured if the cheese could be that amazing then anything made with the whey would be just as good. Simple reasoning, right? Right.

Whole Wheat Whey Pancakes

I googled for a bit about what exactly to do with all this whey and once I got past all of the body building websites (yikes) I found a couple of helpful forums. Mostly, people talked about adding it to baked goods where you would normally add buttermilk. So.... the experiment began.

Side note about pancake making which has absolutely nothing to do with whey but has a lot to do with nostalgic memories of making pancakes at my Dad's house on Saturday mornings. My Dad used to have this awesome griddle in his kitchen. Why someone decided to put a gigantic griddle in his condo is completely beyond me... I think it must have been a 70's thing to go with that amazing avocado refrigerator  Anyway, we made a lot of pancakes on that thing. We would wake up on Saturday mornings and I would dump half of the ingredients on the counter help make the batter (things haven't changed much, have they Dad?). Then he would let me help cook them and when I got old enough I would actually cook them myself. He was always very specific about how much the batter was mixed and exactly how to cook the pancakes. They had to start bubbling on the edges and look just the slightest bit dry. I still make pancakes exactly like that. And they always turn out perfectly. Except now I add crazy things to the batter... like whey.

Whole Wheat Whey Pancakes
Adapted from Joy the Baker

If you don't want to use whey or you're scared of whey or you haven't made cheese in a while (sheesh) then go ahead and use whole milk in the recipe instead of the whey like I used here. They would be just as delicious.

1 1/4 cup whole wheat flour
1/3 cup cornmeal
2 tsp baking powder
1 tsp salt
1 tbsp sugar
1 cup whey
1.2 cup whole milk
2 eggs
1/4 cup vegetable oil
1 tsp vanilla

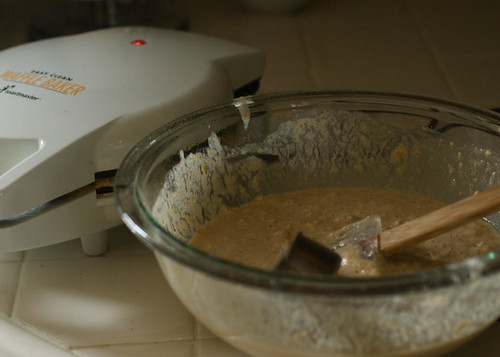
Combine flour, corn meal, baking powder, salt, and sugar in a medium bowl. In a separate bowl, whisk whey, milk, eggs and vanilla. Make a well in the center of the flour mixture and pour in the liquid. Whisk until combined, and then let it sit for 5 minutes to thicken.

Heat a large skillet over medium heat and melt a pat of butter in the center. Add about 1/3-1/2 cup of batter to the pan and let it cook until the edges get all bubbly and slightly dry. Then flip and cook the other side until done.

Serve with strawberries and homemade ricotta from the other day if you have it.

Enjoy!

Sunday, June 26, 2011

Fresh Homemade Ricotta

Homemade Ricotta

OK, I understand that making cheese sounds like an insane proposition. I understand that it sounds like a ton of work. And I understand that it sounds completely and utterly insane to do when the weather outside is amazing and you just want to sit outside in the sun and do nothing. Believe me, I almost didn't make this cheese for all of these reasons.

But, then I thought about sitting on the deck eating freshly made ricotta and sipping a glass of wine, and that sounded better. So I did it. And I was shocked. Completely shocked with how simple this could be. I never even dreamed of making my own cheese because I thought it would be complicated, involved, all that. I'm here to tell you it is easy. Really easy. Easier than making most breads. No joke. It takes maybe 15 minutes of real actual work and 2 hours of patience. Honestly, waiting two hours for it to strain is the hardest thing about this recipe.

Make it. Today. For real.

Homemade Ricotta
Source: Smitten Kitchen

3 1/2 cups whole milk
1/2 cup heavy cream
1/2 tsp coarse sea salt
3 tbsp freshly squeezed lemon juice

In a medium sauce pan fitted with a candy thermometer, heat milk cream and salt to 190, stirring occasionally. Remove from heat and add lemon juice. Stir once or twice just to combine all of the ingredients and then let it sit for 5 minutes.

While the cheese is sitting, line a fine mesh colander with several layers of cheese cloth set over a large deep bowl to catch the whey. After the 5 minutes are up, pour the cheese over the strainer. Let sit for 1-2 hours. 1 hour of straining will give you a smoother spreadable cheese. 2 hours will make it a little thicker. I let it strain for 2 hours and it was wonderful.

Store in a air tight container in the refrigerator.

Serve as normal ricotta on top of eggs or pancakes or in creamy pasta dishes. We had it fresh on top of little slices of toasted baguette. Delicious.

Enjoy!

PS. Wondering what to do with all that leftover whey? Stay tuned. Don't throw it away! It makes pancakes. Really good pancakes.

Wednesday, June 22, 2011

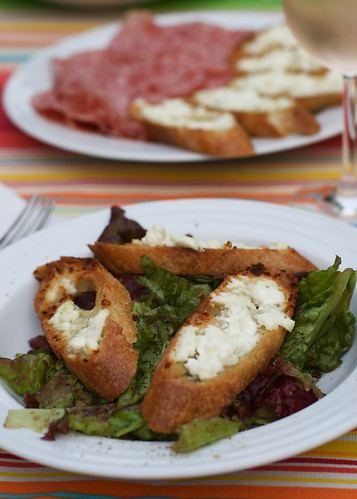
French Goat Cheese Salad

French Goat Cheese Salad

When John and I were on our honeymoon, I ate about a half a million of these salads. OK, I might be exaggerating (a little...) but I did order one of these at just about every restaurant where it was on the menu. And that's not an exaggeration.

Seriously. These. Are. Delicious. For real. I mean, goat cheese on little pieces of toast on a light green salad. What is there not to love?

French Goat Cheese Salad

For the Toasts:
1 baguette, sliced on a bias into thin slices
4 oz goat cheese
olive oil

For the Dressing:
1 tbsp balsamic vinegar
pinch sugar
pinch salt
pinch oregano
freshly ground black pepper
1 tsp spicy mustard
2 tbsp olive oil

1 head leaf lettuce

Preheat the oven to 400. Arrange the sliced of bread on a baking sheet and brush with olive oil on both sides. Bake for about 5 minutes, or until very lightly browned. Remove from oven and spread goat cheese onto all of the toasts. Return to oven for about 5 minutes. After 5 minutes, turn the broiler on to finish melting the cheese and browning the toasts.

Meanwhile, wash and tear the lettuce. Place into a large bowl. In a small bowl combine all ingredients for dressing and whisk until combined. Pour over lettuce and mix until lettuce is thoroughly coated with the dressing.

Serve salad in large shallow bowls with toasts on top.

Enjoy!

Monday, June 20, 2011

Vegan Chocolate Cupcakes with Avocado Frosting

Kaanan and cupcakes

Welcome to the first ever guest post on Dinner From Last Night! Kaanan is going to share an awesome recipe with all of us. And don't be scared of the title... these things rock! - Val

vegan chocolate cupcakes

Hello Val's followers! I'm Kaanan!  We hosted a baby shower for our friend Jill a few weeks ago, and I was in charge of dessert.  I had some very specific requirements when I started looking for a cupcake recipe for the shower... they had to have green frosting, and they had to be egg-less (I'm vegetarian).  The baby's room is going to be green and brown, and color coordination is very important to me.  It only made sense that the cupcakes had to be green and brown too!  Since all I could come up with was spinach frosting, I turned to the internet for guidance.  After sifting through some of the weirder green frosting suggestions  (wheat grass? ew, no thanks), I landed on this gem: avocado butter cream!  The avocado replaces the butter in a traditional butter cream, so its both vegan AND green, not to mention delicious!  There is also an avocado in the cupcakes, and I don't know how, but this is hands down the best vegan cake recipe I've ever tried.  Whether you are in need of a color coordinated cupcake or just a fun dessert, these cupakes are a win!

vegan chocolate cupcakes


Vegan Chocolate Cake with Avocado 
Source:  Joy The Backer
makes 2 dozen cupcakes

3 cups all-purpose flour
6 Tablespoons unsweetened cocoa powder
1/2 teaspoon salt
2 teaspoons baking powder
2 teaspoons baking soda
2 cups granulated sugar
1/4 cup vegetable oil
1/2 cup soft avocado, well mashed, about 1 medium avocado
2 cups water
2 Tablespoons white vinegar
2 teaspoons vanilla extract

Preheat oven to 350 degrees F.  Combine all the dry ingredients except the sugar and set aside.  Mix all the wet ingredients together in a bowl, including the super mashed avocado.  Add sugar into the wet mix and stir.  Mix the wet with the dry all at once, and beat until smooth.  Pour batter into lined cupcake tin. Bake for ~30 minutes, until a toothpick inserted comes out clean.  Let cupcakes cool in pan for 15 minutes, then turn out onto cooling racks to cool completely before frosting with avocado buttercream.

Avocado Buttercream Frosting 
Source: Joy the Baker, originally from Alton Brown

8 ounces of avocado meat, about 2 small to medium, very ripe avocados
2 teaspoons lemon juice
1 pound powdered sugar
1/2 teaspoon vanilla extract


Peel and pit the soft avocados.  It’s important to use the ripest avocados you can get your hands on.  If the avocados have brown spots in the meat, avoid those spots when you scoop the meat into the bowl.  Place the avocado meat into the bowl of a stand mixer fit with the whisk attachment.  Add lemon juice and whisk the avocado on medium speed, until slightly lightened in color and smooth, about 2-3 minutes.  Add the powdered sugar a little at a time and beat.  Add vanilla extract until combined.  The lemon juice should keep the avocados a nice bright green, but I wouldn't make this more than a few hours ahead of time.
Frost your cupcakes and enjoy!!

Monday, June 13, 2011

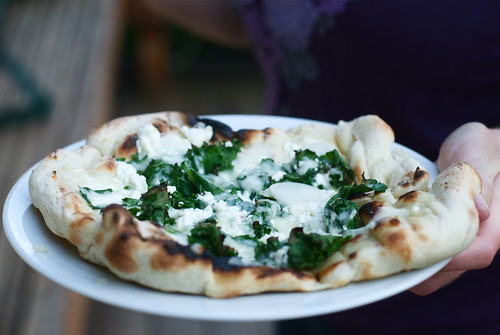
Grilled Kale Goat Cheese Pizza

Kale Pizza

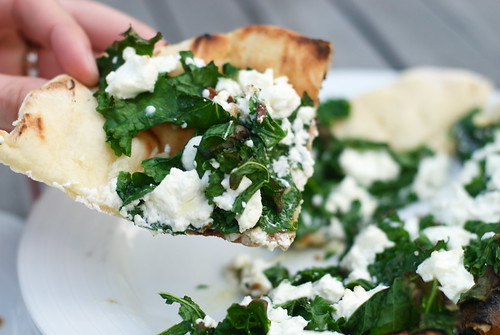
Have you heard of this whole grilling pizza phenomenon? Like, instead of baking you pizza in the oven like any normal person, you grill it? I know. I thought people had totally gone off the deep end with that one. But Saturday I had some Kale in my fridge from this weeks CSA and a massive craving for pizza. Problem is that I just can't bring myself to crank the oven up as high as it will go when the air conditioner is begging for a break.

So, I googled. And I found what might have been the easiest pizza grilling instructions I've ever seen. So... I tried it. And I ate it. All of it. As fast as I could shovel it in my mouth. Seriously people, grilled pizza is awesome.

Kale Pizza

Grilled Kale and Goat Cheese Pizza
Grilling Instructions found here: Serious Eats
1/2 pizza dough recipe
1/2 bunch kale, washed, leaves torn and stems removed
3 cloves garlic, minced
olive oil
4 oz goat cheese
1 cup mozzarella cheese, shredded

You'll have to make these pizzas one at a time, unless you have a massive grill and about 8 hands. There's a lot of opportunity to burn the crust here, so keep it to one at a time so you can watch the dough as it cooks and keep it from burning.

Roll our the dough into roughly 3 personal sized pizza crusts. Set one half of your grill to medium-high heat. Turn the other side down as low as it will go. Place one dough flat right onto the grill grates on the high heat side of the grill. Close the lid, but keep a close eye on it. You want this side of the dough to get browned and the dough to start poofing. Once the dough is slightly browned remove it to a plate with the browned side up. One the cooked side of the dough, drizzle about 1 tbsp olive oil, 1/3 of the garlic, 1/3 of the kale, 1/3 of the mozzarella cheese, and 1/3 of the goat cheese. Carefully slide the pizza onto the low heat side of the grill. You want to cook this side until the cheese has melted, the kale has wilted slightly and the bottom of the crust is browned. If the crust starts to brown too much before the cheese has melted, turn the heat off on that side of the grill. Repeat with the other 2 pizzas. 

Enjoy!

Thursday, June 9, 2011

Pulled Pork

pulled pork


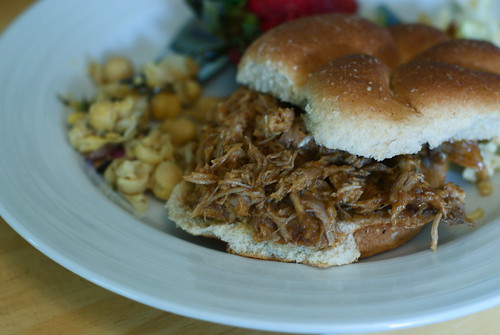
Pulled pork sandwiches make me think of summer barbecues. Even though you don't really barbeque pulled pork... it's more of a long boil in delicious sauce. But for some reason, eating pulled pork makes me think of piling my plate full of pot-luck style side dishes crowding a juicy sandwich in the middle and sitting on a folding chair in the sun. And it makes me happy.

Until this weekend, I hadn't attempted pulled pork. I thought it was best left up to people who know what they're doing. But it was calling to me for some reason and it had to be made. And it was. And all was right in my kitchen. 

Pulled Pork
Source: Adapted from Simply Recipes

I was making this for a baby shower get together this weekend and the mother-to-be can't stand the smell of garlic, so I omitted it from the original recipe. It was really really good this way and I'm sure it would be just as good (if not better) with the garlic added. I've written the recipe the way I made it, with a few other adjustments, but go here for the original version. 

3.5 lb pork shoulder
1 large onion, roughly chopped
1 Jalapeno pepper, seeded and chopped
2 tsp chile powder
1/4 cup tomato paste
2 tbsp ketchup
2 tbsp spicy mustard
3/4 cup white vinegar
1 tsp paprika
2 tsp Worcestershire sauce
1/4 cup light brown sugar
1 bay leaf
salt

Add all ingredients except bay leaf and pork the bowl of a food processor. Process until combined. Place the pork into a large Ziploc bag and add the sauce. Refrigerate overnight. 

When ready to cook the pork, remove it from the bag and place into a large heavy pot. Squeeze all (as much as you can) of the sauce into the pot over the pork. Add 4 cups of water and the bay leaf. Bring to a boil. Reduce to simmer and let cook for about 2 hours, or until the pork easily pulls apart with 2 forks. While cooking, turn the pork every 15-20 minutes so that it cooks evenly. 

When the pork is done, transfer it to a large baking sheet and carefully shred the pork using 2 forks. While shredding the pork, increase the heat to high and bring the sauce to a boil. Let it cook until reduced by at least half and salt to taste. You want the sauce to be a little thick so that it clings to the pork. Once the pork is shredded and the sauce is reduced, return the pork to the pot and stir to combine with the sauce. Let it cook for about 15 minutes on low heat to further reduce the sauce and let the flavors come back together. 

Serve on toasted hamburger buns. While sitting in the sun. 

Enjoy!

Tuesday, June 7, 2011

Cinnamon Sugar Pull Apart Bread


Dear cinnamon sugar pull apart bread. You taste like the endless inside of a cinnamon roll. You make my tummy happy. I like you.


Seriously, if you do anything this weekend, make this bread this bread. It is without a doubt one of the best things to emerge from my kitchen in recent memory. I know I say that a lot... but whatever. It's totally true. And I guarantee that anyone you share this with will agree that's it's awesome. However, the likelihood that this will make it much further than your kitchen without being gobbled up and completely disappearing is low. Just a warning.

I saw this recipe on Joy the Baker and it is easily one of my new favorite blogs. Go check it out - Joy is super awesome.

Cinnamon Sugar Pull-Apart Bread
Source: Joy the Baker

For the bread:
2 3/4 + 2 tbsp all purpose flour
1/4 cup sugar
2 1/4 tsp yeast
1/2 tsp salt
2 tbsp unsalted butter
1/3 cup milk
1/4 cup water
1 tsp vanilla

For the filling:
1 cup sugar
2 tsp cinnamon
1/2 tsp nutmeg
2 tbsp unsalted butter

In a large mixing bowl, combine 2 cups flour, sugar, yeast, and salt. Whisk the eggs in a small bowl and set aside. In a small saucepan, melt butter over medium heat. Add milk and cook until just heated. Remove from heat and add water and vanilla. Let cool for a few minutes until the side of the pan feels warm to touch, not hot (or use a thermometer and measure it at 115-125... I use the hand trick... because my kitchen thermometer sucks).

Mix the milk with the dry ingredients until just starting to combine. Add the eggs and mix into the dough. Add the remaining flour and stir for about 2 minutes. Transfer the dough to a new lightly greased bowl and turn to coat. Cover with plastic wrap and place in a warm happy environment for about 1 hour, or until the dough has doubled in size.

When the dough is almost done rising, melt the butter for the filling over medium heat. Once it is melted, start swirling the pan over the heat until the butter is nicely browned. It should have a golden color and smell nutty. Set aside. Mix together remaining ingredients for the filling and set aside.

Punch the dough down and transfer to a lightly floured work surface. Add 2 more tbsp of flour and knead into the dough. Cover with a towel and let rest for about 5 minutes. Roll or stretch the dough into a long rectangle, about 12 inches wide and 20 inches long, keeping the long edge toward you. Spread the browned butter all over the dough and sprinkle with sugar mix. Cut the dough, width wise, into 6 even strips. As you go, stack the dough, on top of the previously cut strip, sugar side up. Once you have cut all of the strips and you have a stack of dough 6 slices high, turn so that the long edge faces you. Cut the stack into 6 even squares. Turn each of the six square stacks of dough onto the edge and place into a loaf pan. The 6 squares of 6 slices should fill up the entire loaf pan. Cover the dough with plastic wrap and let it rise for about 30-45 minutes in a warm place.

Bake the bread at 350 for about 30 to 35 minutes, or until the top is a deep golden brown (mine took more like 45 minutes). If it isn't completely golden brown, the dough may not be completely cooked through.

Let cool in the loaf pan for a few minutes, then flip out onto a plate and serve. Watch as it disappeares.

Enjoy!

Saturday, June 4, 2011

I'm Back!

I know I've been completely AWOL for months now. But I promise, I'll be back. And because no blog post is complete without pictures, here's a snapshot of some things in the works.


This bread. You're going to thank me for this recipe. Promise.


These sandwiches. Ohhhhh man was this delicious.


And, I'm happy to announce the first ever guest appearance on the blog! Kaanan is going to tell us the secret to making these awesome cupcakes. Can you guess the secret ingredient?

Saturday, March 26, 2011

Split Pea Soup


Split pea soup may not look like anything tasty... in fact it looks a whole lot like something no one would ever want to eat. Something I don't really want to talk about on my blog. Let's just say it comes out of infants... and it's not entirely pleasant.

But what it lacks in appearance, it makes up for in thrifty yummy filling food.

Hearty, healthy, and it uses up ham. In case you are like anyone I know and has pounds of ham lying in the freezer. Not that I would know anyone who has several pounds of ham stockpiled so that it looks like they're preparing for the apocalypse... even though they aren't, they just got a ham for Christmas and they're still trying to use it up... (Ahem, I might be married to this person. Please send your ham recipes... I'm running out of ideas.)

Split Pea Soup
Source: Cooks Illustrated, Feb. 2011

2 tbsp unsalted butter
1 large onion
2 medium garlic cloves, minced
7 cups water
1 lb ham steak, thickly sliced (thawed, if frozen)
4 slices bacon
1 lb split green peas, rinsed and picked through
1 1/2 tsp thyme
2 bay leaves
2 carrots, peeled and diced
1 celery stalk, diced

Heat butter in a large Dutch oven over medium heat. Add onion, 1/2 tsp salt and cook until onion is translucent, stirring occasionally. Add garlic and cook for about 30 seconds to 1 minute, just long enough to release the aroma. Add water, ham, bacon, split peas, thyme, and bay leaves. Bring to a boil, then cover, reduce heat and simmer for about 45 minutes.

Over the next few minutes, the split peas will start to break down from whole, intact split peas in the beginning, to completely broken down delicious mush in the end. For the first part of this cooking process, you want the peas to be about 2/3 broken down; essentially the cooking liquid should be a little thick but there should still be remnants of whole peas in the soup. We'll cook them a little more to get the completely done.

Remove the ham and add carrots and celery. Set ham aside on a plate and cover with foil for about 20-30 minutes. When the ham is cool enough to handle, shred apart with two forks.

Remove bay leaves and bacon from the soup and return ham to the pot. Simmer for a few minutes to heat thoroughly. Season to taste with salt and pepper. Serve with warm crusty bread.

Enjoy!

Sunday, March 13, 2011

Multi-Grain Waffles

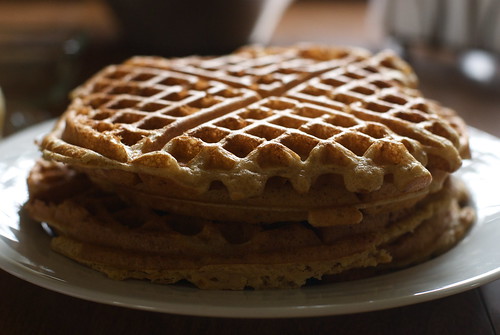
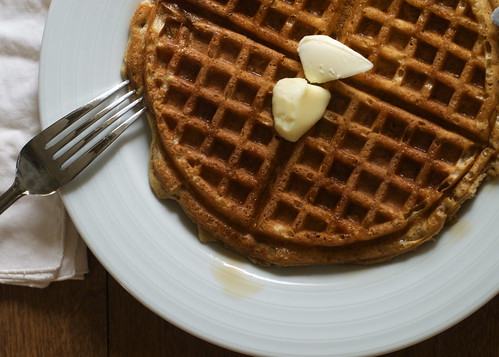
Happy Sunday everyone! Here's a little taste of what this morning looked like over here.

multigrain waffles

multigrain waffles

multigrain waffles

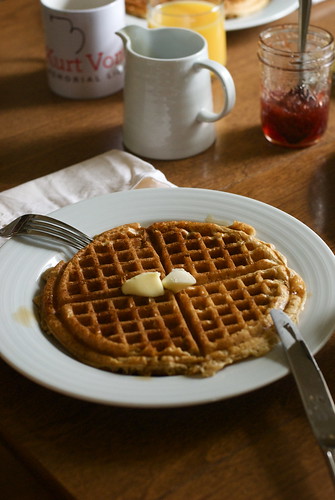
Yum yum yum. Multi-Grain waffles, how can they be so awesome and healthy? I think it's because you add oats, whole wheat four and wheat germ and then douse these with butter and maple syrup. Awesome.

multigrain waffles

Multi-Grain Waffles
Source: Eating Well

2 cups buttermilk*
1/2 cup old-fashioned oats
2/3 cup whole wheat flour
2/3 cup all-purpose flour
1/4 cup toasted wheat germ
1 1/2 tsp baking soda
1/2 tsp baking powder
1/4 tsp salt
1 tsp ground cinnamon
2 large eggs
1 tbsp olive oil
2 tsp vanilla

In a medium bowl, mix buttermilk and and oats. Let sit for about 15 minutes to let the oats soften. 

Meanwhile, in a separate bowl, combine wheat flour, all-purpose flour, baking soda, baking powder, wheat germ, salt and cinnamon. Once the oats are done soaking, add eggs, olive oil and vanilla. Whisk until combined. Add the wet ingredients to the dry ingredients and mix until just combined. 

Heat up a waffle iron and cook waffles according to the manufactures instructions.

Serve with warm maple syrup and butter or, my favorite, strawberry jam. 

This recipe always makes more waffles than John and I can eat in one setting. I use up all the batter and make as many waffles as I can. Then, I stick them in the refrigerator and heat them up in the toaster all week for breakfast. Super easy and delicious weekday breakfast!

Enjoy!

*If you don't have buttermilk on hand (which I usually don't), measure 2 tbsp white vinegar into a measuring cup. Fill with milk until it reaches 2 cups. Let sit for 5 minutes.

Friday, March 11, 2011

Lentil Soup with Vegetables and Kale


Mmmm lentils. I feel like I've been on a real lentil kick lately. They're so versatile, easy, healthy, delicious... where can you go wrong? Plus, they're cheap. Super win there, kiddos. Super win. I've only posted one other recipe for lentils here (which might be the absolute best vegan lentil recipe on the planet). Besides chopping up all the veggies for today's recipe, this cooks up really quickly. Perfect for a weeknight meal.  And it makes a ton of food - great for freezing or lunches all week. So go, cook lentils, and feel happy and healthy.

Lentil Stew with Vegetables and Kale
Adapted from Bon Appétit, March 2011

2 tbsp olive oil
1 large onion, diced
1 rutagaba, peeled and chopped
1 celery root, peeled and chopped
2 carrots, peeled and diced
1 lb green lentils, rinsed
1 tsp dried rosemary
1 tsp dried thyme
1 tsp oregano
1 tsp parsley
1 tsp salt
1 tsp pepper
8 cups vegetable broth
1 large bunch kale, washed, ribs removed, leaves torn into small pieces

In a large pot, heat olive oil over high heat. Add onions, rutabaga, celery root, and carrots. Cook, stirring occaisionally, until lightly browned and softened, about 10 minutes. Add lentils, broth and spices. Bring to a boil. Cover and simmer for about 30 minutes, or until lentils are tender. Add salt and pepper to taste.

If you like your soup a little soupier, add more broth to thin. I like thick heartier soups, so I stuck with the 8 cups of broth, but it was a very tick stew-type soup.

Serve with crusty bread.

Enjoy!

Wednesday, March 9, 2011

Tortellini with Parsnip Bolognese


I love tricky ways of making pasta healthy. Small things like sneakily changing out butter and cream for vegetables. I'm pretty sure that swapping parsnips for the roux in a traditional bolognese sauce cancels out of the cheese I sprinkle on top.

Right? You're all with me here. I know you are.

There's a delicious Parmesan butternut squash pasta that I make sometimes that's just like this. It's good even if you're not a squash fanatic. I'll share it with you sometime. It will make you happy. In the meantime, make this. It's delicious.

Tortellini with Parsnip Bolognese
Adapted from Bon Appétit, March 2011

2 large parsnips
2½ cups milk
1 cup Parmesan cheese
nutmeg
4½ tbsp butter
1½ lbs baby portobello mushrooms
2 cloves garlic
1 tsp dried rosemary
3 8-9oz packages of cheese tortellini
1½ cups freshly grated mozarella cheese
salt
pepper

Peel and cut the parsnips into ½ inch rounds. In a medium saucepan, boil parsnips in salted water until very tender, about 20-30 minutes. Strain the parsnips and add to a food processor. Add 1½ cup milk and puree until smooth. Add the remaining 1 cup of milk with the processor running. If the sauce is thin, return it to the saucepan and reduce for a few minutes. If it is too thick, add more milk. The sauce should be a little thicker than a typical Alfredo sauce. Add ¾ cup of Parmesan cheese and a pinch of nutmeg. Season to taste with salt and pepper.

Meanwhile, clean mushrooms and slice thinly. Melt 2½ tbsp butter in a large frying pan. Add the mushrooms. Add garlic and rosemary and cook until mushrooms are brown and the liquid released by them has evaporated. Season with salt and pepper.

You can stop at this point if you want, cooling and refrigerating the sauce and the mushrooms for up to 1 day. Warm the sauce before continuing.

Preheat the oven to 400°. Bring a large pot of salted water to boil and cook tortellini according to package directions. Butter a 9x13 baking dish. Drain the pasta and mix with remaining 2 tbsp butter. Add the mushrooms to the tortellini and spread into baking dish. Pour the sauce on top. Sprinkle with Mozarella cheese and remaining Parmesan. Base until sauce is bubbly, about 20 minutes. To brown the cheese on top, broil for 2 minutes, turning once. Let rest for 5-10 minutes. Serve with a green salad.

Enjoy!

I can't wait for summer


We're officially signed up for a CSA this summer!

In case you're new here, I started this blog so that I would actually make myself cook interesting meals with the ingredients from the CSA John and I joined last summer. Because if I didn't make myself accountable, we literally would have eaten tofu stir fry almost every night. And that just gets boring after about a week. For more information on CSAs and all of that, look here.

For a while I took pictures of the shares we got each week and tried to show what we made with everything. I'm going to try and do that even more this summer. I can't wait! And since the snow is finally melting and it's raining outside, that means that summer can't be too far away? Right? Winter, are you gone yet?

PS. There's a really interesting article today in the New York Times about sustainable farming. Check it out!

PSS. I'll be back tonight with a recipe for delicious parsnip-y pasta. You know you're interested.

Wednesday, March 2, 2011

Beet Pasta


John has a seriously growing obsession with beets. The only other beet recipe I've posted here is Chicken with Roasted Root Vegetables, but I feel like we eat them all the time. I was looking around at the Bon Appétit website the other day and as soon as I came across this recipe I knew it would be an instant favorite in my house. Plus, I used red beets and then we got to eat pink pasta. Score.

Farfalle with Beets and Spinach
Adapted from Bon Appétit 

The recipe calls for a few things that I either couldn't find or didn't have. First were the golden beets. Normally my local grocery has delicious golden beets with beautiful beet greens. But of course, the one time I really wanted golden beets with beautiful beet greens, they were out. I resorted to using red beets (which is why my pasta turned pink) but the greens weren't exactly beautiful. I substituted spinach and it was delicious! If you can find beets with nice looking greens, use those instead of the spinach that I used in the recipe.

cup pine nuts
2 large bunches of beets (golden or red, depending on what color you want your pasta), peeled and cut into 8 wedges
2 tbsp olive oil
2 large onions, chopped
3 cloves garlic, minced
8 oz spinach
12 oz Farfalle pasta
cup Parmesan cheese

Bring a large pot of salted water to a boil. Boil beets until tender, about 10 minutes. Using a slotted spoon, drain beets. Return the water to a boil and cook the pasta according to package directions. Drain, reserving 1 cup cooking liquid, and keep pasta warm.

Meanwhile, in a large skillet, toast the pine nuts over medium heat, tossing often, 4-5 minutes until lightly browned. In the same skillet, heat 2 tbsp olive oil over low heat. Cook the onions on low until lightly browned, stirring occasionally, about 10 minutes. Add the garlic and cook, stirring, for about 1 minute. Add the spinach (or beet greens) in bunches and sauté until wilted, 5-7 minutes.

In a large bowl, mix the pasta, beets, greens, and Parmesan cheese. Add enough of the cooking liquid, about ¼ cup at a time until sufficiently moistened. Mix until combined. Season to taste with salt and pepper. To serve, sprinkle with additional Parmesan cheese and toasted pine nuts.

Enjoy!                 

Saturday, February 26, 2011

Potato Soup

This is by far one of my favorite comfort foods in the entire world. Except for Macaroni and Cheese which can never ever be replaced. Ever. I can't even talk about it... I'm getting all verklempt.


But this ranks in a close second. It's one of those recipes my Mom used to make on cold rainy days for dinner and it always warmed me up.

My Mom grew up in a really (really really really) small town. We're talking small here. Small as in there aren't any stop lights in the entire town. Small as in they recently got a 3 way stop at the busiest intersection and it was kind of a big deal. Small. This is one of the recipes from the local Catholic church's collection of recipes. These small town cookbooks are treasure troves of delicious home-style recipes. You won't find gourmet truffle risotto in there, but you'll find some of the best casserole and soup recipes ever.


Potato Soup

5 large potatoes, diced (peeled or unpeeled, I do it both ways depending on my motivation level)
3 large onions, diced
5 stalks celery, chopped
1 tbsp salt
1 tsp thyme
1 tsp celery seed
freshly ground black pepper
1/3 cup butter
1/3 cup flour
2 cups whole milk
2 cups shredded cheddar cheese
1 cup sour cream

In a large pot, cook onions, potatoes, celery salt and celery seed in just enough water to cover them. Boil for about 20 minutes, or until fork tender. In a medium saucepan, melt butter over medium heat. Add flour and whisk together to make the roux. Cook for about 3 minutes, stirring constantly, being careful not to burn. Slowly pour in the milk, stirring constantly. Continue cooking milk mixture over medium heat until thick, stirring constantly. Remove from heat and add sour cream and cheese, stir until combined and cheese is melted. Pour the cheese sauce into the pot of boiling vegetables (do not drain the vegetables). Stir until completely combined and cook for a few minutes. If the soup is too thick, add a little water. If the soup is too thin, cook longer until it reaches the desired consistency.

Serve with crusty bread and a small side salad.

Enjoy!

Wednesday, February 23, 2011

Nifflies

Nifflies, otherwise known Spaetzle, are German-style egg noodle dumplings. And they're awesome. If you're not into the whole pork-roast-sauerkraut thing, these are delicious with a pat of butter on top.


Unfortunately I don't have a picture of the nifflies, because frankly, they're not that photogenic. Especially when most of your serving ware is white. And also when you have a husband who you have to hold back from this meal using forks so that you can take a few pictures. If you look really closely, under the mound of sauerkraut John spooned onto his plate, you can see the delicious nifflies sticking out. 

Nifflies
2 cups flour
1 tsp salt
4 eggs
small amount of water

In a medium bowl, mix together flour and salt. Add in the eggs and combine. Add the water, 1 tbsp at a time, until a wet, sticky dough forms. Let the dough sit for 30 minutes.

Bring a large pot of salted water to a boil. One the water is boiling, start cutting the dough in. Using a small spoon, scrape a small amount of the dough (about 1/2 tbsp) from the bowl into the boiling water. To make it easy for the dough to fall off the spoon, quickly dip the spoon with the dough into the water. Repeat until the bottom of the pot is roughly dotted with nifflies. Using a slotted spoon, carefully stir the nifflies off the bottom of the pot, just to get them off the pan. Wait until they float to the top, and then let them cook for a few more minutes (2-3). Use the slotted spoon and remove them from the water. Place into a large serving dish. Cover while you cook the rest. Continue cooking until the dough is gone (I usually have to do about 4 batches). Serve hot with pork roast and sauerkraut.

Enjoy!

Monday, February 21, 2011

Pork Roast and Sauerkraut

This is hands down John's favorite meal. I make this for him every year for his birthday and he eats more than any human person should consume in the span of 30 minutes. We had this for dinner last week on his birthday and he was in German-style dinner heaven. So, for all the German pork roast lovers out there, this one's for you!


Pork Roast and Sauerkraut

As you can see, the ingredient list for this dinner is pretty small, which is awesome. It also means that the type of sauerkraut and quality of pork you use has a dramatic impact on this meal. This time I used Vlasic Classic sauerkraut and good quality pork tenderloin from a local butcher. John said it was the best one I've made!

1 28-32oz jar sauerkraut
1 pork tenderloin (about 1 lb)
olive oil
salt pepper

Preheat oven to 350º. Drizzle olive oil in the bottom of a medium sized oven-proof dish. Spoon sauerkraut into dish. Place pork roast in the middle of the sauerkraut. Sprinkle with salt and pepper.

Bake for about 1-1½ hours, or until a meat thermometer in the pork registers 160º. Remove from oven and cover with aluminum foil. Let rest for about 10 minutes.

Enjoy!

Psst! You should serve pork roast and sauerkraut with Spaetzle (or as we call them Nifflies). Coming on Wednesday!

Friday, February 18, 2011

Almond Cranberry Granola


 I can't believe I haven't shared this recipe with you yet... especially considering I make it about once every two weeks. I guess it's so ingrained into my standard cooking repertoire that it doesn't stand out to me as something special and the fact that I eat it practically every day makes it seem that anyone else would find this completely non-interesting. But then the other day I was eating breakfast and I thought, "someone else might want this... I should share it!" So, here it is friends.

This is honestly one of the easiest things I make. I know I say that a lot around here and John is always telling me that my definition of easy and simple is radically different from that of the general population, but trust me. This will literally take about 7 minutes to throw together. And it's absolutely perfect on top of yogurt for breakfast or ice cream for dessert. Or by itself by the spoonful from the jar... not that I would know or anything. It's crunchy, sweet, and it will actually keep you full until lunch. It's also so simple that you can easily memorize it or customize it however you want! Dried apple slices would be awesome or sunflower seeds for a salty-sweet treat.

Almond Cranberry Granola 

1/4 cup water
3/4 cup brown sugar
4 cups regular oats (not instant)
1 cup slivered almonds
2 tsp cinnamon
1 tsp ginger
1/4 tsp nutmeg
1 tsp vanilla extract
1/2 tsp salt
1/2 cup dried cranberries

Makes about 5 cups of granola.

Preheat the oven to 250. Line a baking sheet with parchment paper.

Mix the water and brown sugar in a microwave-proof bowl and microwave on medium heat for 3-5 minutes, or until the sugar has dissolved. Stir in the vanilla extract and salt into the syrup and set aside.

Mix oats, almonds, cinnamon, ginger, and nutmeg in a large bowl. Pour the syrup over the oats and stir until the syrup evenly coats the oats and they  start clumping together. Dump the oats onto the baking sheet and spread out into an even layet. Bake for 1 hour, or until golden brown.

Using the parchment paper to help, pour the granola into a large bowl, breaking up the pieces as you go. Stir in the cranberries. Once it has cooled completely, transfer to a large airtight container to save.

Serve with plain yogurt and blueberries on top. Perfect!

Enjoy!

Saturday, February 12, 2011

Butternut Squash Risotto


Oh risotto, how I love you so. Creamy, squashy delicious risotto.

I posted a streamlined version of a risotto recipe back in January, which is one of my go-to recipes when that risotto craving hits. Which, to be perfectly honest, is pretty often.

Like the Portuguese Chicken (which if you seriously haven't tried by now, I'm demanding that you get to it), this was once again from my new Bon Appétit magazine that John got me a subscription to for Christmas. I'm not completely sure that that wasn't a slightly self-serving gift since he and his stomach will be reaping the benefits for all the new and awesome recipes that come out if it (just kidding). But, I love it. It's my new favorite cooking magazine. Cook's Illustrated is always an awesome source of recipes, but Bon Appétit has more recipes... and more deliciousness.

Butternut Squash Risotto
Adapted from Bon Appétit February, 2011

I changed the recipe a little bit, mostly to accommodate what I had on hand. I also tried to streamline the recipe a bit, combining the steps a bit so that this wouldn't take so long to make.

1 medium butternut squash, cut into 1/2 inch pieces
4 tbsp olive oil
salt
pepper
1 tsp dried thyme
2 onions
3 1/2 cups vegetable broth
1 1/2 cups arborio rice
1/4 cup sherry
3/4 cup toasted almonds
Parmesan cheese

In a small skillet, toast almonds over low heat until lightly browned. Set aside.

Heat 2 tbsp olive oil in a skillet. Add onions, sprinkle with salt and cook over low heat until golden brown, about 20 minutes, stirring occasionally.

Meanwhile, heat 2 tbsp olive oil in a heavy bottomed pot over high heat. Add squash and sprinkle with salt and pepper. Cook, stirring frequently until lightly browned, about 5 minutes. Reduce heat to medium and add sage. Cook until soft, about 6 minutes longer. Transfer to a bowl and set aside.

In a medium saucepan, add 3 1/2 cups water and vegetable broth to a medium saucepan and bring to a simmer.

Once the onions have caramelized, add the rice to the skillet and coo, stirring constantly until slightly translucent. Add the sherry and cook until it is fully absorbed by the rice. Slowly add the warm broth 1 cup at a time to the rice, stirring constantly until absorbed. Continue adding broth and stirring until all the broth has been added to the rice and the rice is creamy. Season with salt and pepper and add toasted almonds. Sprinkle Parmesan cheese over risotto to serve.

Enjoy!

Thursday, February 10, 2011

Portuguese Braised Chicken


OK. We need to talk, people. If you're a meat eater, you must must must make this dish. This weekend. I'm not even kidding. I'm posting this recipe today so you'll have ample time to go to the grocery and get everything you need to make this. Because really, this is amazing.


I'm been on a big roasted chicken kick lately, but this braised chicken from the most recent edition of Bon Appétit was out of this world! They claim that winter is for braising, and if that lets me eat stuff like this for the next several months, then I'm down with winter cooking. (Even if I keep flirting with the idea of firing up the grill...)


Lucky for me (and my house guests for the weekend), I'm making this again Saturday night! Just thinking about this makes me want to make it right now...

Portuguese Braised Chicken
Source: Bon Appétit February, 2011

1 cup all-purpose flour
1 tbsp plus ¼ tsp paprika
1 3½ lb chicken, cut into 8 pieces
2 tbsp olive oil
1 14.5 oz can diced tomatoes
4 slices bacon, cut into ½ inch pieces
12 pearl onions, peeled
2 roasted red peppers from a jar, cut into ¾ inch strips
6 large garlic cloves, smashed
4 large springs Italian parsley
4 bay leaves
½ cup dry white wine
½ cup sherry
1 tbsp Dijon mustard
1 tbsp tomato paste
1 tbsp butter

Preheat oven to 350°.

Mix four and 1 tbsp paprika with 1½ tsp salt and ½ tsp black pepper. Coat chicken in flour and set aside. In a large heavy bottomed skillet, heat olive oil over medium-high heat. Brown chicken in oil, 3-6 minutes per side. Remove the chicken to a large heavy pot. Add tomatoes, bacon, onions, red peppers, garlic, parsley, and bay leaves.

In the same skillet that the chicken was browned in, add wine and sherry. Bring to a boil and deglaze the pan by scraping all of the browned bits stuck to the bottom. Add mustard and tomato paste and whisk until combined. Pour sauce over the chicken. Cover the chicken and transfer to the oven.

Cook chicken until tender, about 1½ hours. Remove the bay leaves and parsley. Transfer chicken to a platter and using a slotted spoon scoop out the tomatoes, peppers and onions. Return the pot with the sauce in it to the stove and heat over medium high heat. In a small bowl, stir butter and flour into a paste. Add the butter paste to the sauce and stir to combine. Add salt and pepper to taste and cook sauce until desired thickness.

Serve chicken with the delicious, thick sauce, crusty bread and rice.

Enjoy!

Tuesday, February 8, 2011

Mushroom Bourguignon


I'm continuing with the warm stick to your ribs cuisine until the 12 inches of snow on my front lawn melts. I thought about retaliating against all things winter and making fruit salad and unearthing the grill from the mountains of snow, but I figured that wouldn't do a whole lot to keep the chill away. Unless I huddled by the grill on the fire for a while... which would only really melt the snow on my porch... which would then refreeze as soon as I realized staying warm by a grill fire when the temperature is in the single digits is completely insane and the melted snow would then turn to ice and make the back porch an ice rink... which would be pretty hilarious when the dogs come sliding in from the backyard... which might end up in an emergency trip to the vet... which is never a fun experience for anyone involved... which means it might be a bad idea. Therefore, for the sake of my dogs well being, my sanity and the relative peace and quiet of the local vet office, I should just stick to soups and stews for the next few months. Obviously.

Mushroom Bourguignon
Adapted from Smitten Kitchen

2 tbsp olive oil
2 tbsp butter
2 lbs Portabella mushrooms, sliced
1 small carrot
1 small onion, diced
2 cloves garlic, minced
1 cup red wine
2 cups vegetable broth
2 tbsp tomato paste
1/2 tsp dried thyme leaves
1 1/2 tbsp all purpose flour
1 cup pearl onions, peeled
salt and pepper
egg noodles

Heat 1 tbsp butter and 1 tbsp olive oil in a medium dutch oven over high heat. Cook mushrooms until they just start to release liquid, about 4 minutes. Remove to a bowl. In the same pot, heat the rest of the olive oil over medium-low heat. Cook onion, carrot, thyme, a few pinches of salt and black pepper to taste. Cook for about 10 minutes, or until onions begin to brown. Add garlic and cook for about 1 minute, or until fragrant.

Add wine and cook, scraping all of the tasty bits from the bottom of the pan. Reduce wine by about half and add vegetable broth and tomato paste. Add the mushrooms and bring the mixture to a boil. Reduce heat, cover and simmer for about 20 minutes. Add the pearl onions and cook for 5 minutes more. 

Add flour to the remaining tbsp butter and mix until a paste forms. Add the paste to the stew to thicken. Simmer for another 10 minutes, or until stew reaches desired consistency.

Cook egg noodles according to package directions. Spoon stew over noodles to serve.

Enjoy!

Sunday, February 6, 2011

Tortellini Soup


I have seriously woken up every day this week wishing for summer. Every day. I'm so sick of cold and snow and sleet and snirt, which I learned the other morning when I was snowed in is a term New Yorkers coined for a combination of snow and dirt. Snirt. Gross.

I'm sick of it all. I want it to go away. I want to go outside and plant my garden and play in the yard with my dogs without my hands freezing off. OK, I'm done.

To get me out of this I wish winter would just hurry up and leave funk, I made soup. Like any normal person does, right?

This recipe was featured a few weeks ago on the Tasty Kitchen Blog. Have you been there yet? It's an awesome place for all kinds of recipes.I've found a few recipes on there, but the Mattar Tofu is one I've posted about.

This was unbelievably easy. I threw it all together in about 15 minutes and had a warm winter blues relieving soup on the table in a flash. And it' helped! (A little)

Tortellini Soup
Adapted from The Well-Fed Newlyweds on Tasty Kitchen

1 tbsp olive oil
2 cloves garlic
1/2 small onion
1 tsp dried oregano
5 cups vegetable broth
1 14.5oz can whole peeled tomatoes
1 19oz package cheese tortellini
4 cups fresh spinach
Parmesan cheese, to serve

Heat the olive oil in a large pot. Saute onions until soft, about 5 minutes. Add garlic and cook until fragrant, about 30 seconds. Add the oregano, broth and tomatoes to the pot. Break up the tomatoes with the back of your spoon. Add salt and pepper to taste, then bring to a boil. Add the tortellini and cook according to package directions. When the tortellini has about 1 minute left to cook, stir in the spinach. To serve, ladel into large bowls and sprinkle with freshly grated Parmesan cheese.

Enjoy!

Friday, February 4, 2011

Butternut Squash and Carmelized Onion Galette

Ohhh I love finding new delicious vegetarian recipes. They always seem so creative to me instead of meals that are centered around a certain piece of meat. Not that I don't like meat. I do. Really, give me a cheeseburger and I am one happy lady. But, honestly, I usually find vegetarian recipes a lot more interesting. Unless it's a recipe for a cheeseburger...


The picture may look weird (bad lighting in my kitchen at 8pm...) but this was delicious. I mean, how can an open-faced pie type thing with butternut squash and caramelized onions be bad? In my book, it absolutely cannot be anything but awesome, which it was.

Butternut Squash and Caramelized Onion Galette
Adapted from Smitten Kitchen

The ingredients I changed in this recipe were mostly a result of me being unprepared creative or unwilling to buy tons of new ingredients for a recipe thrifty. Oops. For example, I realized I only had 1/8 cup of sour cream when the recipe called for 1/4. Greek yogurt to the rescue! Honestly, you could use either and it would be fine. Also, I had enough leftover Swiss and Parmesan cheese from another recipe and I didn't want to buy a whole new package of Fontina just to make this. And couldn't find a smaller sized squash at the store and I didn't want the rest of the massive one I bought to go to waste. I just threw the whole thing in the galette and it worked out well. If you want to do things the proper way, please see the link above. If you're hungry and impatient like me, please see below.

Filling:
1 medium butternut squash
2 tbsp olive oil
1 large onion, sliced
2 tbsp butter
1 tsp salt
pinch of sugar
1/2 cup Swiss cheese, shredded
1/4 cup Parmesan cheese, shredded

Crust:
1 1/4 cup all-purpose flour
1/4 tsp salt
8 tbsp unsalted butter, cut into small bits
1/8 cup sour cream
1/8 cup greek yogurt
1/4 cup ice water

To make the crust, combine the flour and salt in a small bowl. Using a pastery cutter, cut in the butter until it resembles course meal. In another bowl, mix the sour cream, yogurt and water. Add to the flour mixture and combine by rubbing the dough between your fingers. Mix until the dough is combined, but do not overwork. Cover with plastic wrap and refridgerate for 1 hour.

While the dough is chilling, preheat the oven to 375 and peal and chop the squash into half-inch pieces. Toss the pieces with olive oil and 1/2 tsp salt. Spread evenly onto a baking dish and bake until tender, about 20-30 minutes.

While the squash is roasting, carmelize the onions. Melt the butter in a large skillet over medium heat. Turn the heat to low and add the onions. Cook, stirring occaisionally, until onions are lightly browned, about 20 minutes.

Once the squash is cooked, turn the oven up to 400. On a lightly floured surface, assemble the galette. Roll the dough into a 12 inch round. Transfer to a baking sheet. In a medium bowl, combine onions, squash, Swiss, and Parmesan. Pour filling into the middle of the dough, leaving 1 inch around the edge. Fold the edge over the filling, pleating as you go. Bake for 30-40 minutes, or until the crust is golden brown. Remove from the oven and let it rest for 5 minutes.Transfer to a platter and serve in wedges.

Enjoy!

Wednesday, February 2, 2011

Blizzard Fare

In case you haven't turned on the news in the past 48 hours, you might have missed the fact that there was a gigantic blizzard that covered half of the country. In case you're in the middle of said blizzard and are looking for some yummy food to make while you're snowed in, here a few of my favorite cold weather recipes.


 Fall Lentils - Hearty, simple, healthy.


Potato Leek Soup - Serve with crusty bread. Yummm.


 Vegetarian Chili - Filling and full of delicious veggies.


Butternut Squash Soup - Perfect with a small green salad.

Stay warm out there!

Tuesday, February 1, 2011

Cheesy Baked Pasta

Ever look in your refrigerator and wonder what you can throw together from the random ingredients that are lurking behind milk that might have expired a few days ago and roasted chicken that you're not too excited about eating anymore? This was one of those meals on one of those nights where I wanted to clean out the fridge, but I was sick of leftovers and wanted something a little different. When I combined my scouring efforts between the pantry and the fridge, I had found a half of a box of pasta, leftover pizza sauce and lots and lots of cheese. First, I thought of just whipping up spaghetti, which sounded too boring for me that night. But cheese sounded good, which isn't exactly a stretch considering no one has ever had to force me to eat mass quantities of cheese. So some sort of cheesy pasta dish was in the works.

And then I remembered that John got me these super cute individual sized baking dishes for Christmas that I've been wanting to try out. Thus, cheesy baked pasta was born. And it was good.


Cheesy Baked Pasta
6 oz bowtie pasta (or any leftover pasta you have lying around)
1 cup pasta sauce
1 cup mozzarella cheese, shredded
Parmesan cheese

Cook the pasta according to the package directions. Meanwhile, heat the sauce in a medium sized saucepan over low heat. Once the pasta is cooked, drain and add to the simmering sauce. Stir to coat the pasta in the sauce then pour it evenly into two small oven proof dishes. Top each with half of the shredded mozzarella cheese and then sprinkle with Parmesan. Turn on the broiler and place both dishes on the top rack of the oven, leaving a few inches between the broiler and the top of the pasta. After about 5 minutes, or when the cheese is starting to brown, flip the dishes so that they are both evenly browned on all sides. Broil for another 5 minutes, or until the cheese is completely melted and starting to turn golden brown. Carefully remove the dishes from the oven and serve with crusty bread and salad.

Enjoy!