Sunday, June 26, 2011

Fresh Homemade Ricotta

Homemade Ricotta

OK, I understand that making cheese sounds like an insane proposition. I understand that it sounds like a ton of work. And I understand that it sounds completely and utterly insane to do when the weather outside is amazing and you just want to sit outside in the sun and do nothing. Believe me, I almost didn't make this cheese for all of these reasons.

But, then I thought about sitting on the deck eating freshly made ricotta and sipping a glass of wine, and that sounded better. So I did it. And I was shocked. Completely shocked with how simple this could be. I never even dreamed of making my own cheese because I thought it would be complicated, involved, all that. I'm here to tell you it is easy. Really easy. Easier than making most breads. No joke. It takes maybe 15 minutes of real actual work and 2 hours of patience. Honestly, waiting two hours for it to strain is the hardest thing about this recipe.

Make it. Today. For real.

Homemade Ricotta
Source: Smitten Kitchen

3 1/2 cups whole milk
1/2 cup heavy cream
1/2 tsp coarse sea salt
3 tbsp freshly squeezed lemon juice

In a medium sauce pan fitted with a candy thermometer, heat milk cream and salt to 190, stirring occasionally. Remove from heat and add lemon juice. Stir once or twice just to combine all of the ingredients and then let it sit for 5 minutes.

While the cheese is sitting, line a fine mesh colander with several layers of cheese cloth set over a large deep bowl to catch the whey. After the 5 minutes are up, pour the cheese over the strainer. Let sit for 1-2 hours. 1 hour of straining will give you a smoother spreadable cheese. 2 hours will make it a little thicker. I let it strain for 2 hours and it was wonderful.

Store in a air tight container in the refrigerator.

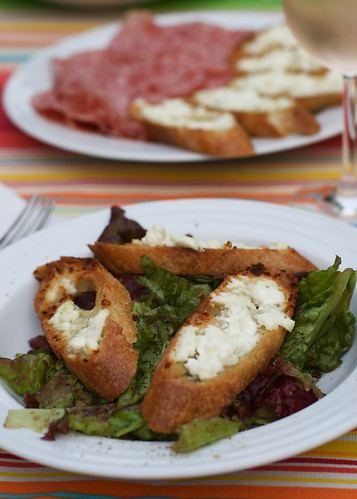
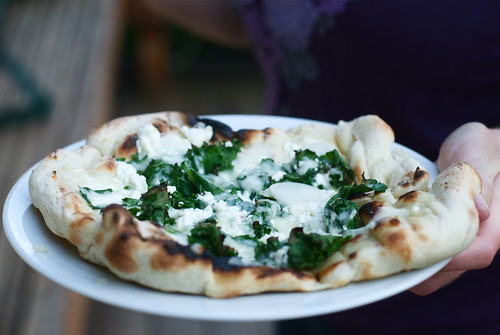
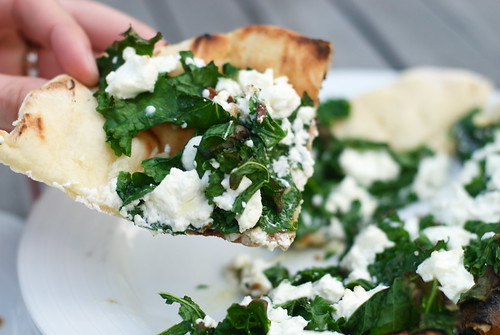
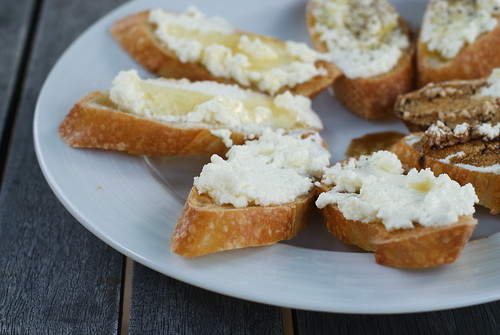
Serve as normal ricotta on top of eggs or pancakes or in creamy pasta dishes. We had it fresh on top of little slices of toasted baguette. Delicious.

Enjoy!

PS. Wondering what to do with all that leftover whey? Stay tuned. Don't throw it away! It makes pancakes. Really good pancakes.

Wednesday, June 22, 2011

French Goat Cheese Salad

French Goat Cheese Salad

When John and I were on our honeymoon, I ate about a half a million of these salads. OK, I might be exaggerating (a little...) but I did order one of these at just about every restaurant where it was on the menu. And that's not an exaggeration.

Seriously. These. Are. Delicious. For real. I mean, goat cheese on little pieces of toast on a light green salad. What is there not to love?

French Goat Cheese Salad

For the Toasts:
1 baguette, sliced on a bias into thin slices
4 oz goat cheese
olive oil

For the Dressing:
1 tbsp balsamic vinegar
pinch sugar
pinch salt
pinch oregano
freshly ground black pepper
1 tsp spicy mustard
2 tbsp olive oil

1 head leaf lettuce

Preheat the oven to 400. Arrange the sliced of bread on a baking sheet and brush with olive oil on both sides. Bake for about 5 minutes, or until very lightly browned. Remove from oven and spread goat cheese onto all of the toasts. Return to oven for about 5 minutes. After 5 minutes, turn the broiler on to finish melting the cheese and browning the toasts.

Meanwhile, wash and tear the lettuce. Place into a large bowl. In a small bowl combine all ingredients for dressing and whisk until combined. Pour over lettuce and mix until lettuce is thoroughly coated with the dressing.

Serve salad in large shallow bowls with toasts on top.

Enjoy!

Monday, June 20, 2011

Vegan Chocolate Cupcakes with Avocado Frosting

Kaanan and cupcakes

Welcome to the first ever guest post on Dinner From Last Night! Kaanan is going to share an awesome recipe with all of us. And don't be scared of the title... these things rock! - Val

vegan chocolate cupcakes

Hello Val's followers! I'm Kaanan!  We hosted a baby shower for our friend Jill a few weeks ago, and I was in charge of dessert.  I had some very specific requirements when I started looking for a cupcake recipe for the shower... they had to have green frosting, and they had to be egg-less (I'm vegetarian).  The baby's room is going to be green and brown, and color coordination is very important to me.  It only made sense that the cupcakes had to be green and brown too!  Since all I could come up with was spinach frosting, I turned to the internet for guidance.  After sifting through some of the weirder green frosting suggestions  (wheat grass? ew, no thanks), I landed on this gem: avocado butter cream!  The avocado replaces the butter in a traditional butter cream, so its both vegan AND green, not to mention delicious!  There is also an avocado in the cupcakes, and I don't know how, but this is hands down the best vegan cake recipe I've ever tried.  Whether you are in need of a color coordinated cupcake or just a fun dessert, these cupakes are a win!

vegan chocolate cupcakes


Vegan Chocolate Cake with Avocado 
Source:  Joy The Backer
makes 2 dozen cupcakes

3 cups all-purpose flour
6 Tablespoons unsweetened cocoa powder
1/2 teaspoon salt
2 teaspoons baking powder
2 teaspoons baking soda
2 cups granulated sugar
1/4 cup vegetable oil
1/2 cup soft avocado, well mashed, about 1 medium avocado
2 cups water
2 Tablespoons white vinegar
2 teaspoons vanilla extract

Preheat oven to 350 degrees F.  Combine all the dry ingredients except the sugar and set aside.  Mix all the wet ingredients together in a bowl, including the super mashed avocado.  Add sugar into the wet mix and stir.  Mix the wet with the dry all at once, and beat until smooth.  Pour batter into lined cupcake tin. Bake for ~30 minutes, until a toothpick inserted comes out clean.  Let cupcakes cool in pan for 15 minutes, then turn out onto cooling racks to cool completely before frosting with avocado buttercream.

Avocado Buttercream Frosting 
Source: Joy the Baker, originally from Alton Brown

8 ounces of avocado meat, about 2 small to medium, very ripe avocados
2 teaspoons lemon juice
1 pound powdered sugar
1/2 teaspoon vanilla extract


Peel and pit the soft avocados.  It’s important to use the ripest avocados you can get your hands on.  If the avocados have brown spots in the meat, avoid those spots when you scoop the meat into the bowl.  Place the avocado meat into the bowl of a stand mixer fit with the whisk attachment.  Add lemon juice and whisk the avocado on medium speed, until slightly lightened in color and smooth, about 2-3 minutes.  Add the powdered sugar a little at a time and beat.  Add vanilla extract until combined.  The lemon juice should keep the avocados a nice bright green, but I wouldn't make this more than a few hours ahead of time.
Frost your cupcakes and enjoy!!

Monday, June 13, 2011

Grilled Kale Goat Cheese Pizza

Kale Pizza

Have you heard of this whole grilling pizza phenomenon? Like, instead of baking you pizza in the oven like any normal person, you grill it? I know. I thought people had totally gone off the deep end with that one. But Saturday I had some Kale in my fridge from this weeks CSA and a massive craving for pizza. Problem is that I just can't bring myself to crank the oven up as high as it will go when the air conditioner is begging for a break.

So, I googled. And I found what might have been the easiest pizza grilling instructions I've ever seen. So... I tried it. And I ate it. All of it. As fast as I could shovel it in my mouth. Seriously people, grilled pizza is awesome.

Kale Pizza

Grilled Kale and Goat Cheese Pizza
Grilling Instructions found here: Serious Eats
1/2 pizza dough recipe
1/2 bunch kale, washed, leaves torn and stems removed
3 cloves garlic, minced
olive oil
4 oz goat cheese
1 cup mozzarella cheese, shredded

You'll have to make these pizzas one at a time, unless you have a massive grill and about 8 hands. There's a lot of opportunity to burn the crust here, so keep it to one at a time so you can watch the dough as it cooks and keep it from burning.

Roll our the dough into roughly 3 personal sized pizza crusts. Set one half of your grill to medium-high heat. Turn the other side down as low as it will go. Place one dough flat right onto the grill grates on the high heat side of the grill. Close the lid, but keep a close eye on it. You want this side of the dough to get browned and the dough to start poofing. Once the dough is slightly browned remove it to a plate with the browned side up. One the cooked side of the dough, drizzle about 1 tbsp olive oil, 1/3 of the garlic, 1/3 of the kale, 1/3 of the mozzarella cheese, and 1/3 of the goat cheese. Carefully slide the pizza onto the low heat side of the grill. You want to cook this side until the cheese has melted, the kale has wilted slightly and the bottom of the crust is browned. If the crust starts to brown too much before the cheese has melted, turn the heat off on that side of the grill. Repeat with the other 2 pizzas. 

Enjoy!

Thursday, June 9, 2011

Pulled Pork

pulled pork


Pulled pork sandwiches make me think of summer barbecues. Even though you don't really barbeque pulled pork... it's more of a long boil in delicious sauce. But for some reason, eating pulled pork makes me think of piling my plate full of pot-luck style side dishes crowding a juicy sandwich in the middle and sitting on a folding chair in the sun. And it makes me happy.

Until this weekend, I hadn't attempted pulled pork. I thought it was best left up to people who know what they're doing. But it was calling to me for some reason and it had to be made. And it was. And all was right in my kitchen. 

Pulled Pork
Source: Adapted from Simply Recipes

I was making this for a baby shower get together this weekend and the mother-to-be can't stand the smell of garlic, so I omitted it from the original recipe. It was really really good this way and I'm sure it would be just as good (if not better) with the garlic added. I've written the recipe the way I made it, with a few other adjustments, but go here for the original version. 

3.5 lb pork shoulder
1 large onion, roughly chopped
1 Jalapeno pepper, seeded and chopped
2 tsp chile powder
1/4 cup tomato paste
2 tbsp ketchup
2 tbsp spicy mustard
3/4 cup white vinegar
1 tsp paprika
2 tsp Worcestershire sauce
1/4 cup light brown sugar
1 bay leaf
salt

Add all ingredients except bay leaf and pork the bowl of a food processor. Process until combined. Place the pork into a large Ziploc bag and add the sauce. Refrigerate overnight. 

When ready to cook the pork, remove it from the bag and place into a large heavy pot. Squeeze all (as much as you can) of the sauce into the pot over the pork. Add 4 cups of water and the bay leaf. Bring to a boil. Reduce to simmer and let cook for about 2 hours, or until the pork easily pulls apart with 2 forks. While cooking, turn the pork every 15-20 minutes so that it cooks evenly. 

When the pork is done, transfer it to a large baking sheet and carefully shred the pork using 2 forks. While shredding the pork, increase the heat to high and bring the sauce to a boil. Let it cook until reduced by at least half and salt to taste. You want the sauce to be a little thick so that it clings to the pork. Once the pork is shredded and the sauce is reduced, return the pork to the pot and stir to combine with the sauce. Let it cook for about 15 minutes on low heat to further reduce the sauce and let the flavors come back together. 

Serve on toasted hamburger buns. While sitting in the sun. 

Enjoy!

Tuesday, June 7, 2011

Cinnamon Sugar Pull Apart Bread


Dear cinnamon sugar pull apart bread. You taste like the endless inside of a cinnamon roll. You make my tummy happy. I like you.


Seriously, if you do anything this weekend, make this bread this bread. It is without a doubt one of the best things to emerge from my kitchen in recent memory. I know I say that a lot... but whatever. It's totally true. And I guarantee that anyone you share this with will agree that's it's awesome. However, the likelihood that this will make it much further than your kitchen without being gobbled up and completely disappearing is low. Just a warning.

I saw this recipe on Joy the Baker and it is easily one of my new favorite blogs. Go check it out - Joy is super awesome.

Cinnamon Sugar Pull-Apart Bread
Source: Joy the Baker

For the bread:
2 3/4 + 2 tbsp all purpose flour
1/4 cup sugar
2 1/4 tsp yeast
1/2 tsp salt
2 tbsp unsalted butter
1/3 cup milk
1/4 cup water
1 tsp vanilla

For the filling:
1 cup sugar
2 tsp cinnamon
1/2 tsp nutmeg
2 tbsp unsalted butter

In a large mixing bowl, combine 2 cups flour, sugar, yeast, and salt. Whisk the eggs in a small bowl and set aside. In a small saucepan, melt butter over medium heat. Add milk and cook until just heated. Remove from heat and add water and vanilla. Let cool for a few minutes until the side of the pan feels warm to touch, not hot (or use a thermometer and measure it at 115-125... I use the hand trick... because my kitchen thermometer sucks).

Mix the milk with the dry ingredients until just starting to combine. Add the eggs and mix into the dough. Add the remaining flour and stir for about 2 minutes. Transfer the dough to a new lightly greased bowl and turn to coat. Cover with plastic wrap and place in a warm happy environment for about 1 hour, or until the dough has doubled in size.

When the dough is almost done rising, melt the butter for the filling over medium heat. Once it is melted, start swirling the pan over the heat until the butter is nicely browned. It should have a golden color and smell nutty. Set aside. Mix together remaining ingredients for the filling and set aside.

Punch the dough down and transfer to a lightly floured work surface. Add 2 more tbsp of flour and knead into the dough. Cover with a towel and let rest for about 5 minutes. Roll or stretch the dough into a long rectangle, about 12 inches wide and 20 inches long, keeping the long edge toward you. Spread the browned butter all over the dough and sprinkle with sugar mix. Cut the dough, width wise, into 6 even strips. As you go, stack the dough, on top of the previously cut strip, sugar side up. Once you have cut all of the strips and you have a stack of dough 6 slices high, turn so that the long edge faces you. Cut the stack into 6 even squares. Turn each of the six square stacks of dough onto the edge and place into a loaf pan. The 6 squares of 6 slices should fill up the entire loaf pan. Cover the dough with plastic wrap and let it rise for about 30-45 minutes in a warm place.

Bake the bread at 350 for about 30 to 35 minutes, or until the top is a deep golden brown (mine took more like 45 minutes). If it isn't completely golden brown, the dough may not be completely cooked through.

Let cool in the loaf pan for a few minutes, then flip out onto a plate and serve. Watch as it disappeares.

Enjoy!

Saturday, June 4, 2011

I'm Back!

I know I've been completely AWOL for months now. But I promise, I'll be back. And because no blog post is complete without pictures, here's a snapshot of some things in the works.


This bread. You're going to thank me for this recipe. Promise.


These sandwiches. Ohhhhh man was this delicious.


And, I'm happy to announce the first ever guest appearance on the blog! Kaanan is going to tell us the secret to making these awesome cupcakes. Can you guess the secret ingredient?