It's mini break time for me while the turkey is in the oven and before side-making-madness begins. What are you doing today? Are you cooking for your whole family? Spending a quit Thanksgiving with friends? Providing support while someone else does all the heavy lifting?
I hope you all have a fantastic Thanksgiving! Eat lots (that's what I'm doing)!
Thursday, November 25, 2010
Wednesday, November 24, 2010
Sweet Potato and Swiss Chard Gratin
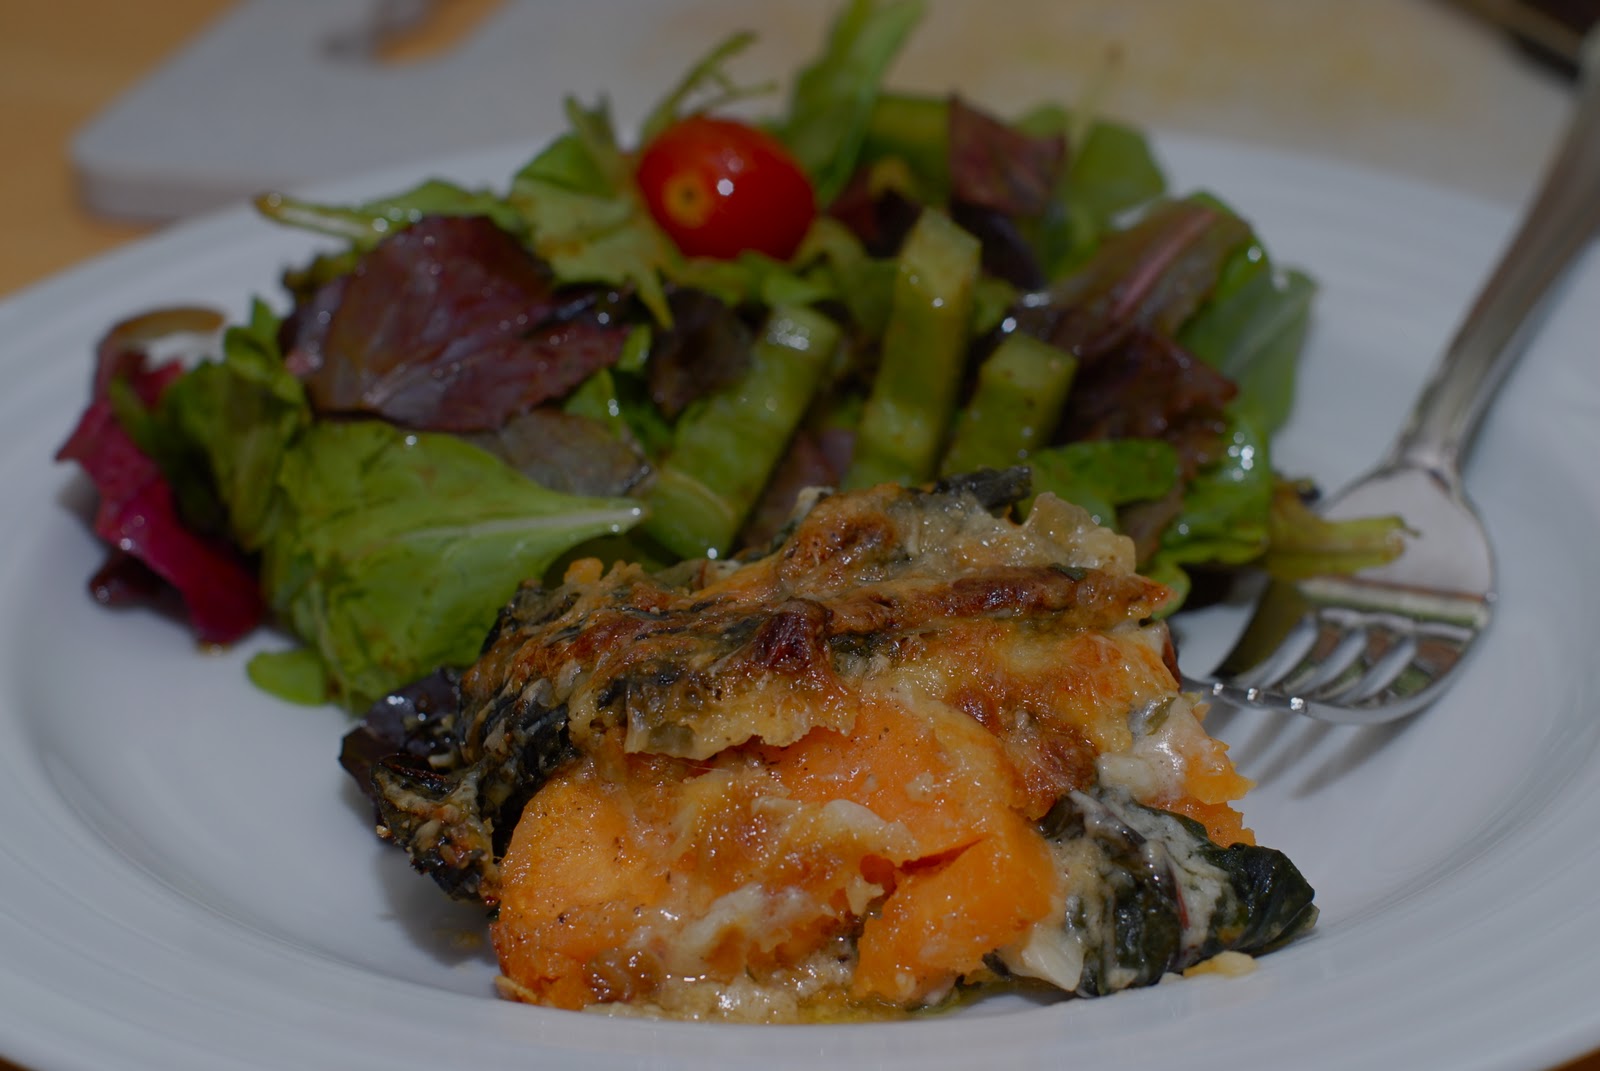
I am not at all opposed to slathering butter and sugar on something healthy and turning it into something delicious that doesn't resemble health food in the least. In fact, it looks more like candy than anything else. This year though I wanted to take my sweet potatoes in more of a savory route away from the pecan crusted sweet potatoes I've had for years. So, I'm slathering them with butter, cream and cheese. Ohhh yes.

Seriously, sweet potatoes and swiss chard ("healthy") + butter, cream, cheese ("unhealthy", yet delicious) = perfection. I'm just going to tell myself that eating all that healthy stuff on the far left of this equation negates all of the fat and excess calories consumed by the addition of the "unhealthy" portion. Win win!

This is my last post in the pre-Thanksgiving posting spree, since tomorrow is Thanksgiving and it might be slightly counter-productive to post Thanksgiving recipes after the fact. So happy eating to all tomorrow!
Swiss Chard and Sweet Potato Gratin
Source: Smitten Kitchen
I also cut this recipe in half since I don't want to end up with mountains and mountains of leftovers for Thanksgiving. The original recipe should feed 12, so mine should feed 6. (Great job on the math there, Val. That took some real hard brain-thinkin'.) Scale this one up to feed more if you need!
I did learn that cutting the ingredients for the sauce in half means you should cut the cooking time in half as well. My sauce was super thick and as a result my gratin was a little dry. I adapted that in the recipe, so you should be good to go!
2 tbsp butter
1 small onion, diced
1.5 lbs swiss chard (2 bunches), cleaned and leaves and stems separated and cut into 1 inch pieces
1 cup whole milk
1 clove garlic, minced
1 tbsp flour
1 lb sweet potatoes, peeled and sliced into 1/8 in thick rounds
1/2 tbsp minced fresh parsley
1/2 tbsp fresh thyme
salt
pepper
3/4 cup shredded Gruyere cheese
In a large skillet over medium heat, cook onions in 1 tbsp butter until soft, about 3-4 minutes. Add swiss chard stems and cook until soft, about 8 minutes. Increase heat to medium-high and add the chard leaves. Cook, stirring, until wilted. Transfer the greens to a colander and press the excess liquid out with the back of a spoon. Set aside.
To make the sauce, add the milk and the minced garlic to a small saucepan and bring to a simmer. Melt 1 tbsp butter in a medium saucepan and aff the 1 tbsp flour. Cook the roux, whisking constantly for about 30 seconds. Slowly pour in the warm milk, whisking constantly. Keep whisking for another 30 seconds, then remove from heat. Season with salt and pepper to taste.
Now we assemble the gratin! We're going to make two layers of sweet potatoes/salt/pepper/herbs/cheese/swiss chard/sauce. So, first butter an 8x8 baking dish. Layer half of the sweet potatoes evenly on the bottom of the pan. Sprinkle with salt, pepper, 1/4 of the herbs and 1/4 cup of cheese. Spread half of the greens on top of the cheese, then pour half of the sauce on top. Repeat this once more. Then sprinkle with more salt and pepper, the remaining herbs and the remaining cheese. Press the vegetables down into the sauce as much as you can.
Bake in a 400 degree oven (preheated) for about 30-40 minutes, until bubbly and slightly brown on top. Let stand for a few minutes before serving.
Enjoy!
Tuesday, November 23, 2010
Roasted Garlic Mashed Potatoes

I had a roommate in college who showed me the way. The way of garlic. Her philosophy was always that more garlic is better. Seriously, she would eat whole slices of raw garlic while chopping it for dinner. And while I think there are some garlic-free dishes that are perfect as they are, potatoes can sometimes use a little pick-me-up and garlic+potatoes is an awesome combination. Especially when that garlic is browned and nutty and delicious. Seriously, who knew that simply roasting garlic could make something that is already delicious be so much more amazing?

This is how I'm spicing up my mashed potatoes for Thanksgiving next week. I love regular mashed potatoes, in my opinion it's one of the best comfort foods around, but since this is my first time making the whole Thanksgiving dinner, I wanted to do something a little special.

Roasted Garlic Mashed Potatoes
1 head garlic
2 lbs potatoes, peeled and chopped
1/4 cup whole milk
2-3 tbsp butter
salt pepper
First you need to roast the garlic. Preheat the oven to 350. Chop one end off the top of the head of garlic so that all of the individual cloves are exposed and put the garlic in an oven-proof pan. I usually use a small cake pan or a pie pan. Drizzle the cloves with olive oil and bake for about 30-40 minutes, until the cloves are lightly browned and starting to squeeze out of their papery little cases. Let them cool a bit, until you can handle the garlic, and squeeze the individual cloves into a small bowl. Be sure to pick out any of the papery cases that come out with the cloves of garlic. Set aside.
Meanwhile, add the potatoes to a pot and cover with cold water. Add about 1 tsp salt. Boil for about 20 minutes, or until the potatoes are fork tender. Drain and return to the pan.
Using a potato masher or a hand mixer, mash the potatoes in the same pot. I usually turn the heat on low while I'm mashing up the potatoes. I think I read somewhere that this helps the steam release from the potatoes so they're not so watery. Or something. Once the potatoes are mashed add the roasted garlic, butter, milk, salt and pepper and work everything together using the potato masher. Taste and adjust the seasonings. Add more milk if the potatoes seem too dry.
You can either serve these potatoes just like this, or you can put them in the oven to keep them warm while you get everything else together on the big day. I stuck these in my oven for about 20 minutes while I was waiting for the rest of our dinner to cook. They got a little browned on top and had a slightly crispy top, which I really liked.
Enjoy!
Monday, November 22, 2010
No Knead Dinner Rolls

Alright kiddies, it's time to bust out those Thanksgiving recipes because we're only a few days away! I'm cooking Thanksgiving dinner for the first time this year. The whole thing! Granted there will be a maximum of 5 people there. I guess this is a nice start for me to ease into cooking the Thanksgiving feast! I'm so excited!

Since this is my first time to do the whole thing myself, turkey, sides and all, I'm kind of going all out. I'm making these rolls, this pie, along with a few other sides I'll be posting in the next two days.

No Knead Rolls
Source: The Pioneer Woman
I cut the recipe in half since I'm only feeding a few people for Thanksgiving and I didn't want 10,000 rolls left over. Just scale this up or down to feed as many as you need. This recipe would have made about 18 rolls. I only made the 12 that fit in my muffin pan and then froze the rest of the dough for later.
2 cups milk
1/2 cup sugar
1/2 cup vegetable oil
4 1/2 cups flour
2 1/4 tsp active dry yeast
1/2 tsp baking powder
1/2 tsp baking soda
1 tbsp salt
In a large pot, combine milk, sugar, and vegetable oil over medium-high heat. When the mixture just starts boiling, turn off the heat and let it sit for about 20 minutes. I waited until the side of the pot felt warm to the palm of my hand. You want the milk mixture to be warm enough to create a nice happy environment for the yeast, but cool enough so that it doesn't kill the yeast the second they touch the liquid.
Next, add 2 cups of the flour and the yeast. Stir this mixture to combine, then add the rest of the flour and keep on stirring. Once you have everything mixed, cover the pot with it's lid and let the dough rise for about 1 hour.
Once the dough has doubled in size, add 1/2 cup of remaining flour, along with the baking powder, baking soda and salt. This will be tough to stir in, so use a good sturdy spoon or knead it just a few times right in the pot. Butter a muffin pan. Tear off small walnut sized pieces of dough and form into balls between the palms of your hands. Drop three of these into each of the muffin cups. Cover with plastic wrap and let rise for about an hour.
Bake in a 400 degree oven for about 20 minutes, until lightly browned.
Enjoy!
Saturday, November 13, 2010
Apple Cinnamon Rolls

As promised, this recipe does not contain potatoes. But look out. This week I'm going to be trying out some Thanksgiving recipes. And we all know that the best part of the entire Thanksgiving meal is the sides. And that's a lot of potatoes, my friends.
What today's recipe does contain is apples, cinnamon, flour, yeast and caramel. Yay!

And let me tell you: These. Are. Awesome. However, they were pretty time consuming to make. Between making the dough and the various rising and baking times, I spent most of the morning and early afternoon making this one Sunday. It wasn't a ton of actual work time, but they do need a little attention every so often. But believe me, one bite made me completely forget about how long these took to make. I was simply planning on when I could make more.
Seriously, make these tomorrow morning. You'll be happy you did.
Caramel Apple Cinnamon Rolls
Source: Annie's Eats
Rolls:
6 1/2 tbsp sugar
1 tsp salt
1 tsp cinnamon
pinch ground nutmeg
5 1/2 tbsp unsalted butter
1 large egg, slightly beaten
1 tsp lemon zest
3 1/2 cups bread flour
2 tsp instant yeast
1 cup plus 2-4 tbsp whole milk
Filling:
1 1/2 tbsp unsalted butter
3 granny Smith apples, peeled, cored and cut into 1/4-inch slices
1/4 cup sugar
1/2 tsp cornstarch
1/4 tsp cinnamon
pinch nutmeg
pinch salt
1 tsp vanilla extract
3 tbsp plus 1 tsp sugar
3/4 tsp cinnamon
Glaze:
4 oz cream cheese
1 tbsp unsalted butter
3 tbsp caramel sauce
1 tbsp milk
1/2 tsp vanilla extract
1 cup powdered sugar
About 1/2 half hour before you start making the dough, set the butter, egg and milk out so that they are about at room temperature when you start cooking.
In the bowl of an electric mixer, cream together the sugar, salt, cinnamon, nutmeg and butter on medium speed, until smooth. Add the egg and lemon zest, and mix until combined. Next, add the four, yeast and milk and mix until a dough forms. You may need to add a little extra milk or flour to get it to the right consistency. If your mixer has a dough hook, switch to that and knead on low speed for about 8 minutes. If you do not have a dough hook, transfer the dough to a lightly floured work surface and knead by hand for about 10 minutes. Drizzle a little oil into a new large bowl and transfer the dough. Turn to cover the dough in oil and the cover and let rise in a semi-warm place for about 2 hours, or until doubled in size. Since my kitchen is a little cold and drafty, I usually let my dough rise in the oven (make sure it's off) and it's pretty happy in there.
While the dough is rising, make the filling. Heat butter in a large skillet over medium heat. Add the apples, cinnamon, sugar, corn starch, nutmeg, and salt. Stir to combine and thoroughly coat the apples in the cinnamon-sugar goo (ohh delicious goo). Cook for about 18 minutes, stirring occasionally. Remove from heat and stir in vanilla. In a small bowl, whisk together the rest of the sugar and cinnamon.
Once the dough is done rising, lightly spray a work surface with oil. Using a rolling pin or your hands, spread the dough into a large rectangle, with the wide end of the rectangle facing toward you. If the dough is sticking to your hands or the rolling pin, lightly dust with flour. Sprinkle the cinnamon sugar mixture all over the dough. Spread the apples evenly over the surface of the dough. Now get ready to roll!
Starting at the end closest to you (this should be the wide end of the rectangle), start rolling the dough away from you. When you get to the end of the dough, pinch the seam closed so the rolls don't unravel apart after you bake them. You should have one very long log of cinnamon apple goodness.
With the seam side down, cut the log into equally sized rolls. You can cut them as large or as small as you want. Make sure they're roughly the same size though so they bake at the same pace. Transfer the sliced rolls to a parchment lined baking sheet. Cover loosely with plastic wrap and let rise for about 90 minutes.
(This is one place you can stop and put the rolls into the refrigerator and save them for a few days. This would be a great place to stop if you're making them the day ahead of time.)
Once the rolls have finished rising, preheat the oven to 350. Bake the rolls for 20-30 minutes, until golden brown. (Note: In the picture above I did not let my rolls bake quite long enough. If you pull yours out of the oven and they look like mine, throw them back in for about 5 minutes.) Once the rolls are cooked, let them cool on a wire rack for about 10 minutes.
(This is another place you could halt this whole process. I actually make a TON of rolls, way too many for John and me to eat without gaining 30 lbs. each. I froze a few of these in a large Ziploc bag to save for later. When you want them, just pull them out of the freezer and bake at 350 for about 30-35 minutes. When they're done baking, add the glaze.)
While the rolls are cooling, make the glaze. Combine the cream cheese and butter in a microwave-safe bowl and heat at 15-20 second intervals until you can whisk it together. Add the caramel sauce, milk, and vanilla and whisk until combined. Whisk in the powdered sugar until smooth. Drizzle over the rolls. Cool the rolls for another 15-20 minutes.
Enjoy!
Phew, I told you that was a long one. But seriously, these were some of the best things to come out of my kitchen in a long long time.
Wednesday, November 10, 2010
Sweet Potato Fries

Is it just me or are sweet potato fries one of the best inventions of all time? I mean, normal old french fries are amazing, but throw in sweet potatoes??? Whaaaa??? It totally blew my mind the first time I saw these. Granted the first time I got them was after I moved and lived somewhere other than the middle of a cornfield for the first time in my life. Maybe all that corn blocked the inspiration needed to dunk a bunch of sweet potatoes into a vat of grease and fry them until they were crisp and delicious.

This is a slightly healthier version of your typical sweet potato fries. I neither had a large vat of grease nor wanted to commit myself to the clean up after. I read this post on Smitten Kitchen and decided that this was one of the best things you could do to any kind of potato. They're really simple to make and so so good. John and I devoured them in approximately 3.29 minutes. No joke, I totally timed us.
Sweet Potato Fries
Adapted from Smitten Kitchen
3 medium sweet potatoes
salt
pepper
1/4 cup olive oil
Preheat oven to 400.
If you're into neat clean peeled fries, peel the sweet potatoes. If you don't care, leave the skins on and cut the sweet potatoes into 1/2 inch sticks. Dump the sweet potatoes into a pot of cold water and season with 1 tbsp salt. Bring the water to a boil. As soon as the water boils, check the potatoes. If you can easily stick a sharp paring knife into them, remove them from heat and drain carefully. The potatoes will be a little soft, so be careful not to break them apart.
Allow the potatoes to cool slightly. Brush a baking pan with about 1-2 tbsp of the olive oil, enough so that the potatoes don't stick. Then toss the potatoes with remaining olive oil, 1/2 tsp kosher salt and about 1/2 tsp freshly ground black pepper. Spread into a single layer onto the greased baking sheet and bake for about 40 minutes, or until the potatoes are slightly browned and crisp.
Enjoy!
P.S. I promise to not post anything about potatoes next time. Instead I will be talking about sugar. And yeast. And caramel. And it will be good.
Monday, November 8, 2010
Potato Leek Soup

Fall is confusing me this year. One week it's freezing every day and I'm tempted to pull out my giant puffy winter coat. Then on my drive home from Washington, DC last week it was snowing up in the hills of Pennsylvania. Snowing. And now, this week it's supposed to be in the 60's. I really with it would make up it's mind.

I made this soup a few weeks ago during one of the first fall cold snaps. It's one of the few things that can make the first freezing days of fall better to me. Make it on the next cold days that you have. It will make those cold fall days that much better.
Potato Leek Soup
Adapted slightly from David Lebovitz
3 tbsp Butter
4 leeks
1/2 tsp salt
1/2 tsp dried thyme
1/4 tsp chili powder
6 cups water
1 1/4 pounds potatoes
2 bay leaves
freshly ground pepper
Melt butter in a medium size dutch oven or pot (I used a 5 quart dutch oven) over medium heat.
Add the slides leeks and salt. Cook over medium heat for 5 minutes until soft.
Add the thyme and chili powder and cook, stirring, for about 30 seconds.
Add the potatoes, water, and bay leaves. Cover and simmer until the potatoes are fork tender, 15-25 minutes. Remove the bay leaves and turn off the heat. Using a food processor or a blender puree soup in batches or puree right in the pot using an immersion blender. I prefer the immersion blender, but use whatever you have.If the soup is too thick, thin down with water.
Reheat over low heat to warm the soup back up. Serve with a nice salad and a big slice of crusty bread.
Enjoy!
Subscribe to:
Posts (Atom)